---
id: 974f36e12dfcece861bfda1af9303980
author: Yunjin Lee
title: 无需 CGo 的 Go Tcl/Tk(modernc.org/tk9.0)GUI 实现:控件打包与图像渲染
description: 在 Go 中实现窗口创建、按钮/菜单栏控件的打包以及 SVG/PNG/ICO 图像渲染,使用不依赖 CGo 的跨平台库 modernc.org/tk9.0。
language: zh
date: 2024-10-22T11:51:27.614782351Z
path: /blog/posts/creating-a-gui-with-tk-in-go-z004dd008
category: gui
lang_canonical:
ko: https://blog.naver.com/bugaku/223629101405
---
Python 中默认内置了 Tkinter 等 GUI 库。
近来,Go 语言也开发出了可以使用 Tcl/Tk 的 [CGo-Free, Cross Platform Tk 库](https://pkg.go.dev/modernc.org/tk9.0)。今天我们将介绍它的基础用法。
## 创建 Hello, Tk
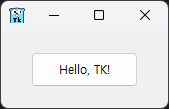
首先,从一个简单的 'Hello, TK!' 示例开始。
```go
package main
import tk "modernc.org/tk9.0"
func main() {
tk.Pack(
tk.TButton(
tk.Txt("Hello, TK!"),
tk.Command(func() {
tk.Destroy(tk.App)
})),
tk.Ipadx(10), tk.Ipady(5), tk.Padx(15), tk.Pady(10),
)
tk.App.Wait()
}
```
---
下面详细查看上述示例代码及其运行结果。
如果您有使用 Python Tk 的经验,应该能理解窗口中打包控件,或在窗口下直接打包控件的结构。根据控件的类型,标签等内容会包含在其中。
_Ipadx 和 Ipady 是 Internal padding 的缩写,用于调整内部控件的内边距。在本示例中,调整的是按钮的内边距。_
该库中有一个 Window 结构体,并且 App 变量负责管理顶层窗口。它已在库内部预先定义。因此,用于结束 tk.App.Wait() 的 tk.App.Destroy() 函数承担关闭顶层窗口的作用。
接下来,我们看一看 GitLab 的 \_examples 文件夹中的几个示例。
## 处理 SVG 文件
以下是在标签控件中显示 SVG 文件的示例。
```go
package main
import . "modernc.org/tk9.0"
// https://en.wikipedia.org/wiki/SVG
const svg = `
`
func main() {
Pack(Label(Image(NewPhoto(Data(svg)))),
TExit(),
Padx("1m"), Pady("2m"), Ipadx("1m"), Ipady("1m"))
App.Center().Wait()
}
```
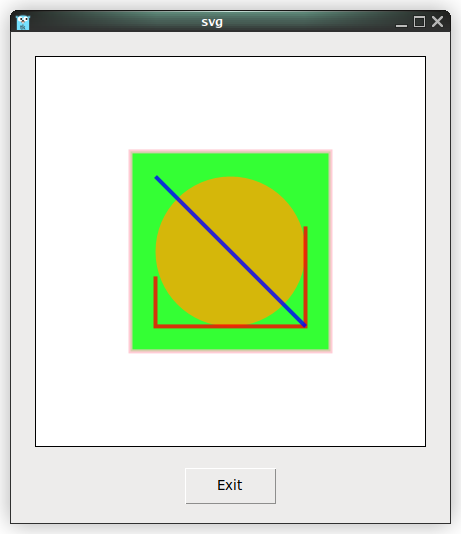
该库处理 SVG 的方法如下:
1. 将 SVG 文件的内容读取为字符串(或像上面的示例那样直接嵌入)。
2. 将该内容传递给 Data 函数,转换为包含选项的字符串(-data 选项)。
3. 转换后的字节值被传递给 NewPhoto 函数,返回表示 Tcl/Tk 图像的 Img 结构体指针。
4. 经过 Image 函数后,Img 结构体指针被转换为添加了 -Image 选项的字符串。
5. 之所以转换为包含结构体 RAW 值的字符串,是为了创建 Label 控件。
ICO 和 PNG 文件也以类似的方式处理。
## 处理 PNG 文件
```go
package main
import _ "embed"
import . "modernc.org/tk9.0"
//go:embed gopher.png
var gopher []byte
func main() {
Pack(Label(Image(NewPhoto(Data(gopher)))),
TExit(),
Padx("1m"), Pady("2m"), Ipadx("1m"), Ipady("1m"))
App.Center().Wait()
}
```
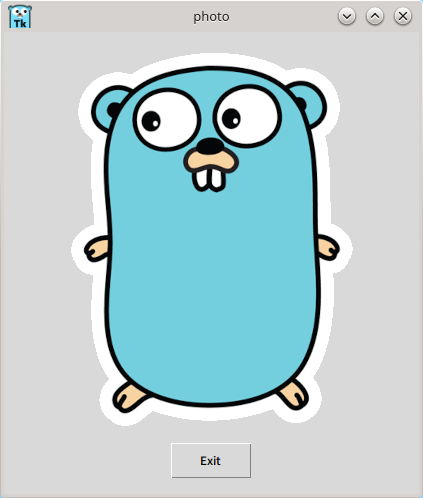
PNG 文件的处理过程如下:
1. 将嵌入的 gopher.png 转换为包含选项的字符串类型。
2. 通过 NewPhoto 函数转换为 \*Img 类型。
3. 经过 Image 函数转换为 RAW 字符串后,创建为标签控件。
ICO 文件的处理方式与此相同,与 SVG 格式的区别仅在于 Data 函数内部的处理方式。
这里我们来看看“包含选项的字符串”的本质:
```go
type rawOption string
```
前面提到的包含选项的字符串,实际上只是格式化后的字符串。
```go
func (w *Window) optionString(_ *Window) string {
return w.String()
}
```
optionString 方法是 Window 指针的方法,返回一个字符串。
最后,我们简要看一下 Data 函数的内部结构:
```go
func Data(val any) Opt {
switch x := val.(type) {
case []byte:
switch {
case bytes.HasPrefix(x, pngSig):
// ok
case bytes.HasPrefix(x, icoSig):
b := bytes.NewBuffer(x)
img, err := ico.Decode(bytes.NewReader(x))
if err != nil {
fail(err)
return rawOption("")
}
b.Reset()
if err := png.Encode(b, img); err != nil {
fail(err)
return rawOption("")
}
val = b.Bytes()
}
}
return rawOption(fmt.Sprintf(`-data %s`, optionString(val)))
}
```
从代码中可以看出,对于 ICO 或 PNG 文件,需要进行编码/解码处理。
对于其他情况,不做特殊转换,仅为转换为字节形式的字符串添加 -data 选项,以标明它是 Data 函数的结果。
### 使用菜单控件加载图像
在之前练习的 PNG、ICO 加载示例中加入菜单控件,即可制作一个显示所需图像的应用程序。
首先,我们来看一个简单的菜单控件示例。
```go
package main
import (
"fmt"
. "modernc.org/tk9.0"
"runtime"
)
func main() {
menubar := Menu()
fileMenu := menubar.Menu()
fileMenu.AddCommand(Lbl("New"), Underline(0), Accelerator("Ctrl+N"))
fileMenu.AddCommand(Lbl("Open..."), Underline(0), Accelerator("Ctrl+O"), Command(func() { GetOpenFile() }))
Bind(App, "", Command(func() { fileMenu.Invoke(1) }))
fileMenu.AddCommand(Lbl("Save As..."), Underline(5))
fileMenu.AddSeparator()
fileMenu.AddCommand(Lbl("Exit"), Underline(1), Accelerator("Ctrl+Q"), ExitHandler())
Bind(App, "", Command(func() { fileMenu.Invoke(4) }))
menubar.AddCascade(Lbl("File"), Underline(0), Mnu(fileMenu))
App.WmTitle(fmt.Sprintf("%s on %s", App.WmTitle(""), runtime.GOOS))
App.Configure(Mnu(menubar), Width("8c"), Height("6c")).Wait()
}
```
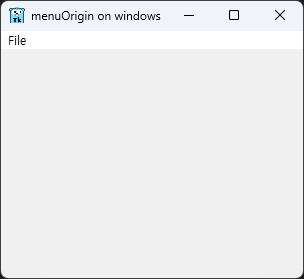
本示例中,我们尝试了菜单栏与菜单的创建、文字强调、Command 选项、快捷键绑定,以及设置应用程序窗口的初始大小。
现在,我们修改由 GetOpenFile 指定的 Command 函数,制作一个加载并显示图像的程序。
程序的编写计划如下:
1. 限制只能打开 PNG 和 ICO 文件
2. 处理在文件对话框中选择的文件
3. 实现用于显示图像的控件
以下是体现该计划的代码:
```go
package main
import (
"fmt"
"log"
"os"
"runtime"
"strings"
. "modernc.org/tk9.0"
)
func handleFileOpen() {
s := GetOpenFile()
for _, photo := range s {
formatCheck := strings.Split(photo, ".")
format := formatCheck[len(formatCheck)-1]
if (strings.Compare(format, "png") == 0) || (strings.Compare(format, "ico") == 0) {
picFile, err := os.Open(photo)
if err != nil {
log.Println("Error while opening photo, error is: ", err)
}
pictureRawData := make([]byte, 10000*10000)
picFile.Read(pictureRawData)
imageLabel := Label(Image(NewPhoto(Data(pictureRawData))))
Pack(imageLabel,
TExit(),
Padx("1m"), Pady("2m"), Ipadx("1m"), Ipady("1m"))
}
picFile.Close()
}
}
func main() {
menubar := Menu()
fileMenu := menubar.Menu()
fileMenu.AddCommand(Lbl("Open..."), Underline(0), Accelerator("Ctrl+O"), Command(handleFileOpen))
Bind(App, "", Command(func() { fileMenu.Invoke(0) }))
fileMenu.AddCommand(Lbl("Exit"), Underline(1), Accelerator("Ctrl+Q"), ExitHandler())
Bind(App, "", Command(func() { fileMenu.Invoke(1) }))
menubar.AddCascade(Lbl("File"), Underline(0), Mnu(fileMenu))
App.WmTitle(fmt.Sprintf("%s on %s", App.WmTitle(""), runtime.GOOS))
App.Configure(Mnu(menubar), Width("10c"), Height("10c")).Wait()
}
```
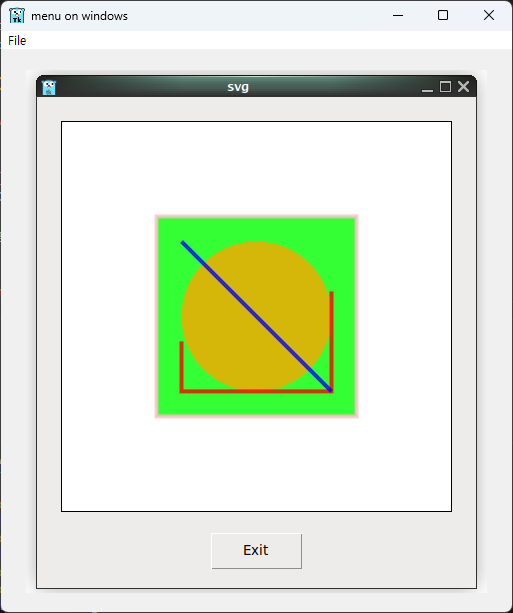
上述代码按以下方式工作:
1. 使用 strings 包的字符串比较函数检查文件扩展名
2. 使用 os 包打开文件,读取后关闭
3. 读取的图像以标签控件的形式显示
## 总结
本文利用 Go 语言的 Tcl/Tk 库介绍了以下内容:
1. GUI 应用程序的基本结构
2. SVG、PNG、ICO 等多种图像格式的处理
3. 控件打包与布局管理
4. 图像数据处理结构
5. 快捷键绑定与控件命令
将 Go 语言与 Tcl/Tk 结合使用,可以制作简洁而实用的 GUI 程序。希望您以此为基础,挑战开发更复杂的 GUI 应用程序。